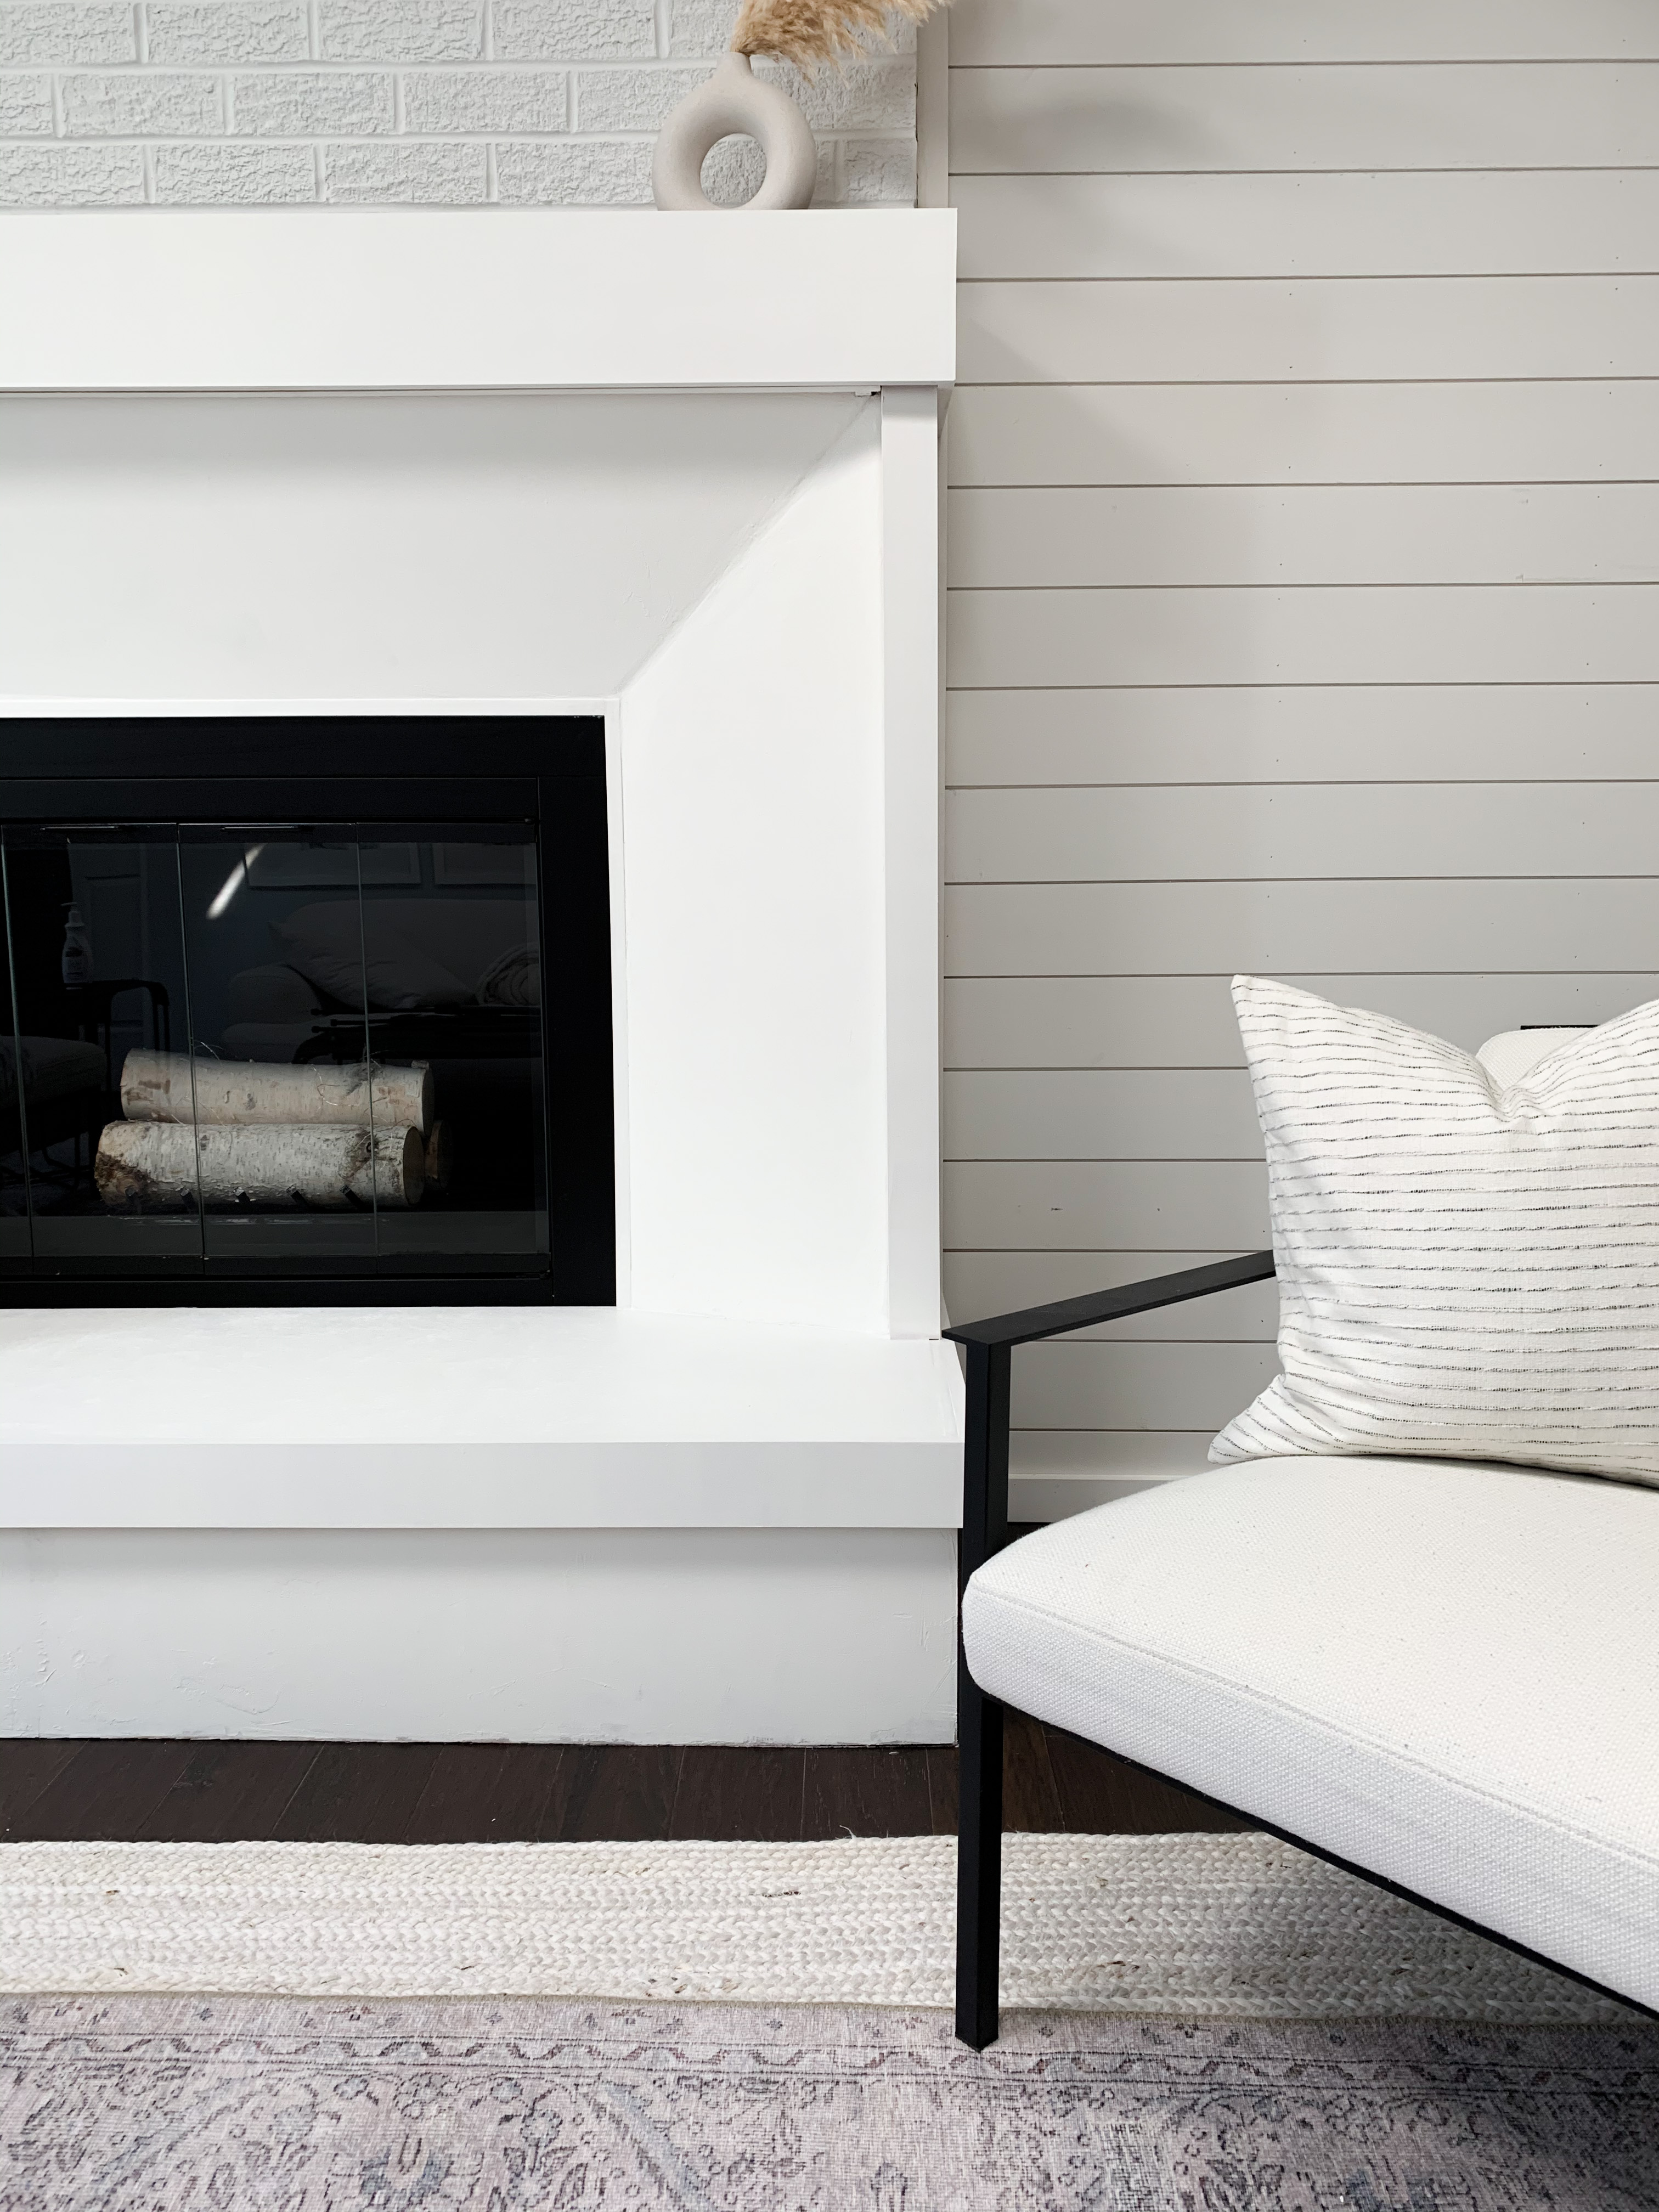
Because I know it will come up, let me start by saying we do NOT use our fireplace. The cover is strictly for decorative purposes and isn’t to code…. which explains why I had to remove it when we sold the house (insert cry emoji).

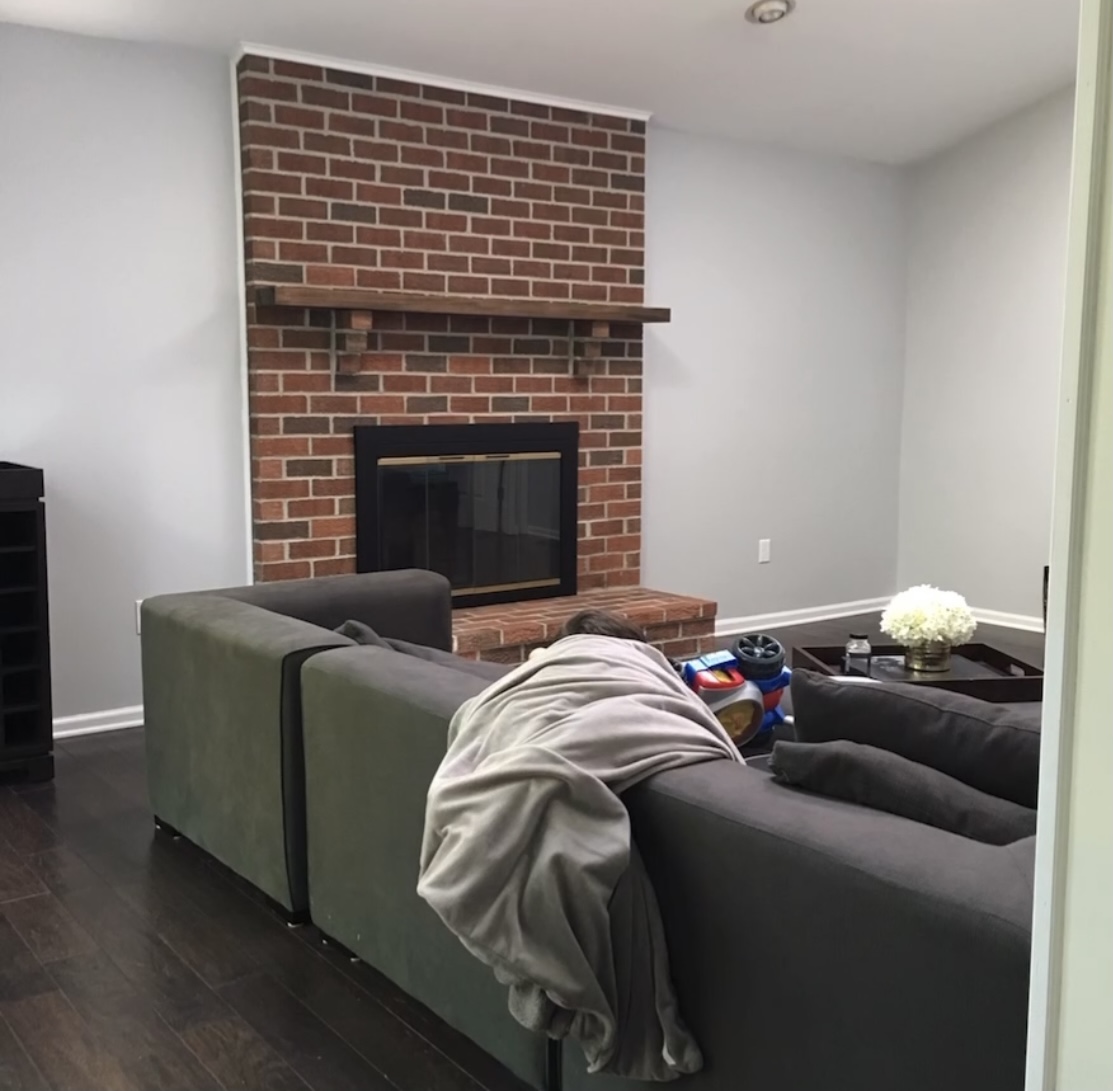
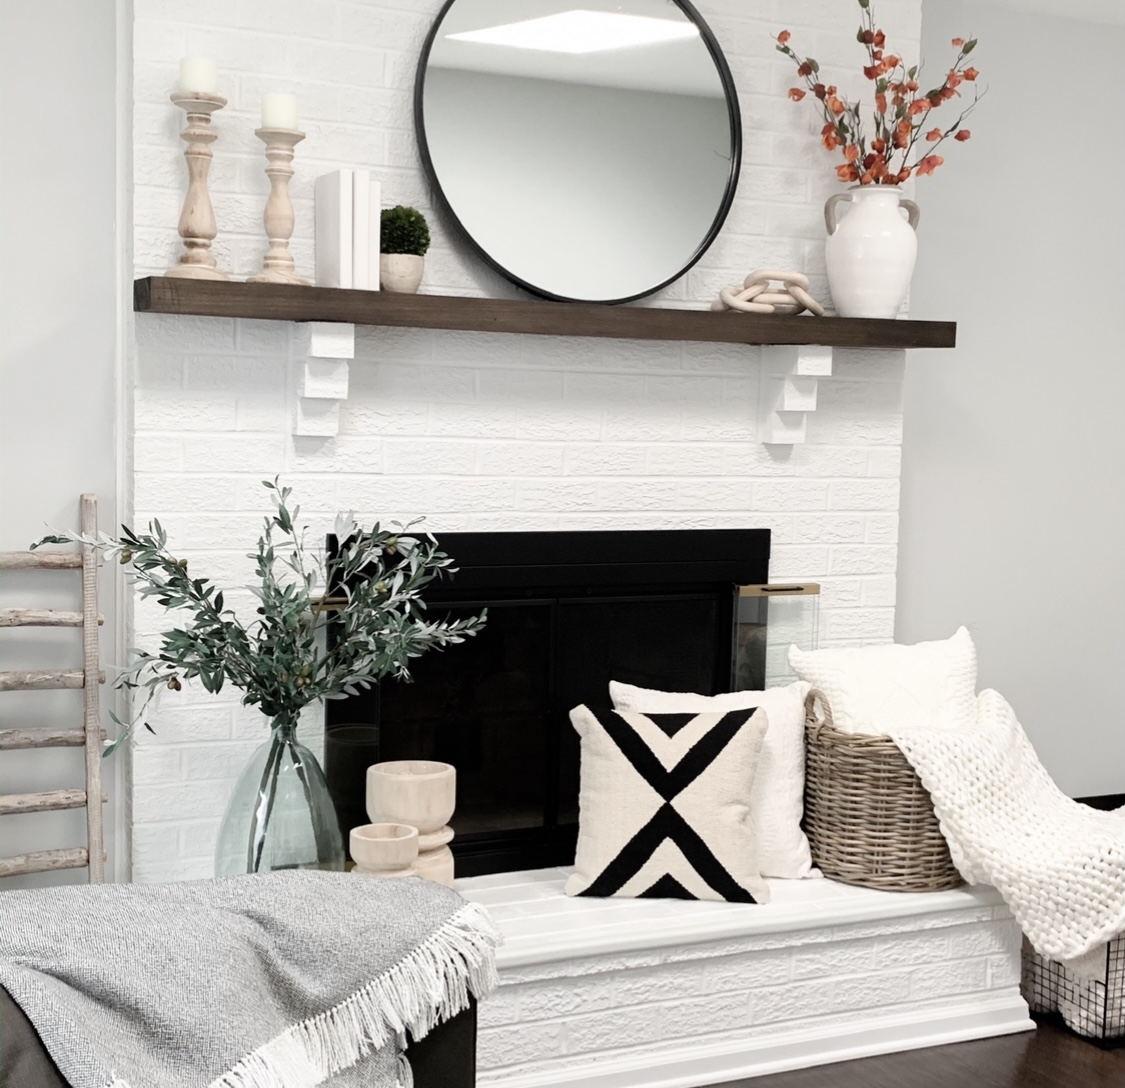
The original fireplace was brick. So pretty, but it didn’t quick fit our style. We painted it white and went with farmhouse vibes for most of the time we lived in this house. As my style shifted to being more modern, I wanted to try to update the look of the fireplace as well.


I didn’t know if this would actually work, so one of my biggest priorities was avoiding damage to the brick and wood mantle underneath. As much as I love the modern look, I knew that a lot of potential buyers would prefer the brick. White brick is classic and somewhat timeless, in my opionion!
The Frame


I wish I had a step-by-step guide for how to build this exact cover, but something like this varies by fireplace. I built the frame of the cover using the mantle as my anchor. Screwing 2×2’s into the mantle to make it super secure, I then attached the rest to these 2×2’s. I used absolutely NO glue on the mantle or brick, only screw holes that I could fill and stain if needed.


I added plywood panels down each side, the same depth as the 2×2 that lined up with the brick protruding the farthest. This distance needed to be the same around the entire perimeter to keep the slanted panels at the same angle. The side pieces didn’t need as much support, since they have the hearth holding them up. The top piece needed support boards added to give me something to nail them into. I beveled the ends at the same angle as the plywood sheets and put them 1/2″ back, the thickness of the plywood.


The Angled Plywood Sheets
This part was brutal, I’m not going to lie. I’m convinced there has to be an easier way, but I was not fortunate enough to discover it myself. My method used a lot of trial and error and frustration. I measured the outside edge, the inner edge, and the angle of the tilt. I thought I’d be able to cut the plywood pieces at 45 degrees, and they would magically fit together. Due to the tilt, I had no such luck. Instead, I held the pieces where I wanted them to meet and drew guestimated cut lines with a pencil.


After chatting with some friends and doing some research, I think there are two ways you could make this work…
- Like a pitched roof – Keep the side panels rectangles from bench to mantle. Calculate the exact dimensions of the piece across the top and the angle required to make it sit flush on both sides. Bevel the angled cut to that angle.
- Like crown moulding – Once you calculate the tilt (16 degrees for me), you would need to cut the angled parts of the panel while the pieces are propped up at that angle. With crown moulding, that isn’t a big deal, but with wide panels, I couldn’t figure out how to do that on my miter saw.

Add Some Texture
I love the look of a plaster fireplace, there are so many cool techniques to choose from. I first tried to use Plaster of Paris because I could mix in my Benjamin Moore Cotton Balls paint to get the color I love. The only issue is that it dries kind of fast. I needed to mix lots of smaller batches, and it took too long.

I decided to try joint compound…. super cheap and super quick! I applied it with little swipes, as if I were applying Roman Clay. Once dry, I swiped Cotton Balls over top in feathery layers. It was a total success, such a pretty effect!


Framed DIY Art and Lights
For the framed artwork, I printed out a photo from a vacation we took a few years ago. I added dimension to it using a technique that I saw @buildwith_em use. She has a tutorial saved in her highlight bubbles on Instagram… It was awesome!

The pendant lights were kind of random, but I ended up really liking them. I glued two little lamp shades together and covered them with join compound. I used puck lights, held together and in place with a wire, as the “bulbs”. I faked the metal mount look with wood I had on hand, painted black. There was some trial and error, but when is there not??


I can’t even describe how awesome the finished product was. The vibe of the entire room changed after this fireplace makeover, and I’m OBSESSED.
We found out we were moving, less than a month after I finished the fireplace. Since it wasn’t to code, we decided to remove it before listing the house. It was painful to remove and the last thing I wanted to do. I documented all on IG, and I still plan on doing something similar in our new home…. I don’t know why I feel the need to torture myself haha.


